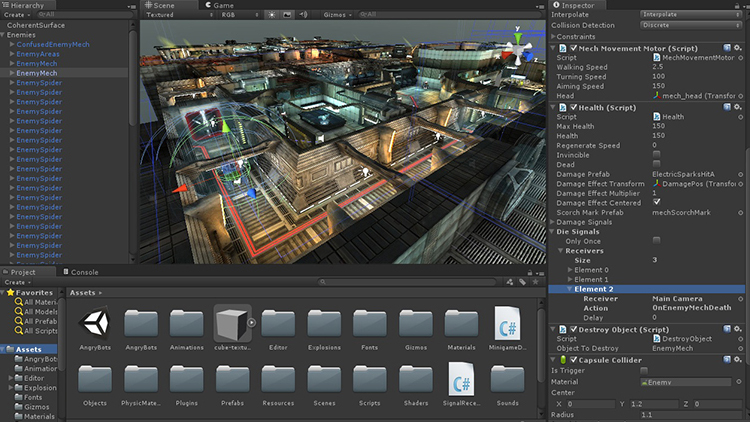
Introduction to C# Scripting Language
C# is a powerful and versatile programming language used to write scripts in Unity. Scripts are the backbone of your game, allowing you to control the behavior and interactions of game objects. Let’s dive into some hands-on examples to get you started with C# scripting in Unity.
Example 1: Creating Your First Script
To create your first script, start by right-clicking in the Project window in Unity, selecting “Create,” then “C# Script,” and naming it FirstScript. Double-click the script to open it in your code editor. Replace the default content with:
csharpusing UnityEngine;
public class FirstScript : MonoBehaviour
{
void Start()
{
Debug.Log("Hello, Unity!");
}
}
Attach this script to any game object in your scene. When you press Play, the message “Hello, Unity!” will appear in the Console window.
Example 2: Printing a Message on Update
Modify your script to print a message continuously:
csharpusing UnityEngine;
public class FirstScript : MonoBehaviour
{
void Update()
{
Debug.Log("Updating...");
}
}
This script will print “Updating…” every frame while the game is running.
Example 3: Controlling Object Movement
Create a script named MoveObject and write the following code:
csharpusing UnityEngine;
public class MoveObject : MonoBehaviour
{
public float speed = 5f;
void Update()
{
transform.Translate(Vector3.forward * speed * Time.deltaTime);
}
}
Attach this script to a game object, and it will move forward continuously.
Writing Simple Scripts to Control Game Objects’ Behavior
Writing scripts to control game objects is essential for developing interactive games. Here are some practical examples to illustrate this.
Example 4: Moving an Object with Keyboard Input
Create a script named MoveWithKeyboard:
csharpusing UnityEngine;
public class MoveWithKeyboard : MonoBehaviour
{
public float speed = 5f;
void Update()
{
float moveHorizontal = Input.GetAxis("Horizontal");
float moveVertical = Input.GetAxis("Vertical");
Vector3 movement = new Vector3(moveHorizontal, 0.0f, moveVertical);
transform.Translate(movement * speed * Time.deltaTime, Space.World);
}
}
This script allows you to move an object using the arrow keys or WASD keys.
Example 5: Rotating an Object
Create a script named RotateObject:
csharpusing UnityEngine;
public class RotateObject : MonoBehaviour
{
public float rotationSpeed = 100f;
void Update()
{
float rotation = Input.GetAxis("Horizontal");
transform.Rotate(Vector3.up, rotation * rotationSpeed * Time.deltaTime);
}
}
Attach this script to an object to enable rotation with the horizontal input axis.
Example 6: Changing Object Color on Mouse Click
Create a script named ChangeColorOnClick:
csharpusing UnityEngine;
public class ChangeColorOnClick : MonoBehaviour
{
void OnMouseDown()
{
GetComponent<Renderer>().material.color = Color.green;
}
}
This script changes the object’s color to green when clicked.
Implementing Basic Game Mechanics
Basic game mechanics include essential interactions like player movement, object collision, and scoring. Let’s explore how to implement these mechanics.
Example 7: Implementing Player Jump
Create a script named PlayerJump:
csharpusing UnityEngine;
public class PlayerJump : MonoBehaviour
{
public float jumpForce = 5f;
void Update()
{
if (Input.GetKeyDown(KeyCode.Space))
{
GetComponent<Rigidbody>().AddForce(Vector3.up * jumpForce, ForceMode.Impulse);
}
}
}
This script makes the player jump when the Space key is pressed.
Example 8: Detecting Collisions
Create a script named DetectCollision:
csharpusing UnityEngine;
public class DetectCollision : MonoBehaviour
{
void OnCollisionEnter(Collision collision)
{
Debug.Log("Collision detected with " + collision.gameObject.name);
}
}
Attach this script to any game object with a Collider component to detect collisions.
Example 9: Collecting Items
Create a script named CollectItem:
csharpusing UnityEngine;
public class CollectItem : MonoBehaviour
{
void OnTriggerEnter(Collider other)
{
if (other.gameObject.CompareTag("Collectible"))
{
Destroy(other.gameObject);
Debug.Log("Item collected!");
}
}
}
This script destroys a collectible item and prints a message when the player collides with it.
Example 10: Implementing a Score System
Create a script named ScoreManager:
csharpusing UnityEngine;
using UnityEngine.UI;
public class ScoreManager : MonoBehaviour
{
public Text scoreText;
private int score;
void Start()
{
score = 0;
UpdateScoreText();
}
public void AddScore(int value)
{
score += value;
UpdateScoreText();
}
void UpdateScoreText()
{
scoreText.text = "Score: " + score;
}
}
Then create another script named Collectible:
csharpusing UnityEngine;
public class Collectible : MonoBehaviour
{
public ScoreManager scoreManager;
public int scoreValue = 10;
void OnTriggerEnter(Collider other)
{
if (other.gameObject.CompareTag("Player"))
{
scoreManager.AddScore(scoreValue);
Destroy(gameObject);
}
}
}
Attach ScoreManager to a UI Text element and Collectible to collectible objects. This setup increases the player’s score when they collect an item.
These examples provide a solid foundation for using C# to script various game behaviors in Unity. As you continue learning and experimenting, you’ll be able to create more complex and interactive game mechanics.

Leave a Reply